Prisoner of War Book Photo Gallery
Photo gallery of a B-24 bomber that is much of the setting for the book “Prisoner of War.”
Click on each photo for more information.

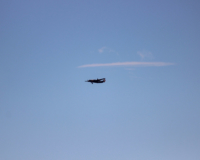
Taxiing in. Since the pilots cannot see the wingtips, the flight engineer is posted as an observer to make sure that they do not collide with anything.

Taxiing in. Since the pilots cannot see the wingtips, the flight engineer is posted as on observer sure that they do not collide with anything. Notice the open bomb bay doors. These doors were left open while taxiing to provide a quick exit in the event of an emergency.

This is an early model B-24. The sand-colored paint scheme is called “desert pink” and was primarily used in north Africa. Notice the difference in the nose. Early models, like Bullseye and Peregrine, had greenhouse-style Plexiglass paneling and flexible guns, as seen here. Later models, such as the one belonging to the Collings Foundation, had a hydraulic turret instead.

First produced in 1936, the B-17 Flying Fortress was the first four-engine American bomber to be built and is one of the best-known planes of WWII. When the B-24 Liberator came out several years later, much debate ensued regarding which plane was superior. Many believed the B-17 to be easier to fly than the B-24, and its low wing made it unquestionably safer to ditch. The Liberator, meanwhile, boasted the highly aerodynamic Davis wing, which gave it an edge in flying efficiency, and an extra bomb bay, which enabled it to carry a heavier payload. Each plane has its fan club, but both were effective strategic bombers and played a very important roll in the Allied bomber offensive.

For each mission a bomber completed, a bomb was painted on the nose. Each crew was only required to fly twenty-five or thirty missions, depending on the group, but some aircraft saw combat many times before being shot down or retired.

When a bomber crew succeeded in shooting down an enemy fighter plane, a swastika was painted on the nose to record this.

On the rear fuselage of the aircraft was painted the squadron code, a letter and number indicating to which squadron the plane belonged. The tail fin was painted with a set of markings specific to the entire bomb group, and a letter in the center of the fin specified the aircraft amongst others in the squadron. Notice the black on the fin’s leading edge. This is a rubber de-icer boot which can be inflated to break ice from the fin.

The B-24’s landing gear retracts outward and upward into the wing, a rather unusual design. Also notice the de-icer boot on the wing leading edge.

This is a close-up of the open bomb bay door. The doors slid upward on tracks along the sides of the fuselage, rather like a roll-top desk. When the doors were opened to drop the bombs, this design caused minimal drag.

Although the opening is only about two feet off the ground, the nosewheel doors are one of the three primary entrance points. Entering here enabled the navigator, bombardier, and nose gunner to access the nose and stow their gear without crawling through the tunnel.

Although the opening is only about two feet off the ground, the nosewheel doors are one of the three primary entrance points. Entering here enabled the navigator, bombardier, and nose gunner to access the nose and stow their gear without crawling through the tunnel.

This is the forward part of the flight deck; just ahead is the cockpit. The strap in the center is the control locking strap, which keeps the control surfaces (rudders, elevators, and ailerons) from moving in the wind. On the right side is the radio operator’s position. At the top center is the top hatch, where the flight engineer stands as observer while taxiing. Located about halfway up the bulkhead (center of photo), the step on which he stands is very small.

View from the top hatch just behind the cockpit. The pilots could not see any of the wing past the outboard engine (the one further away.) Long and narrow, the Davis wing was an advanced and very aerodynamic design. This gave the B-24 an edge in flying, but it couldn’t handle as much combat damage to the wings as the B-17.

Nathanael’s position: the pilot’s seat. The pilot had many instruments to monitor while flying. A modern GPS unit, seen on the right, has replaced the C-1 automatic pilot system used in the war.

The view from the pilot’s seat. Although the pilots relied primarily on instruments to fly the B-24, it was also necessary to watch for other aircraft and sometimes landmarks or obstacles. The bubble on the nose is the astrodome, which the navigator used to take fixes for celestial navigation.

Robbie’s position: the copilot’s seat. The B-24 is too much airplane for one pilot to fly. One of the copilot’s responsibilities is to monitor the instruments related to engine performance, such as fuel pressure, oil pressure, and oil temperature.

The top turret. Some crews had a designated top turret gunner while in other crews, like Nathanael’s, this position was assigned to the flight engineer.

This is the flight deck bench; to the right is the bulkhead behind the cockpit. (The seats in the foreground have been added to the Collings Foundation Liberator to better accommodate passengers.) The gold-colored cylinder is a fire extinguisher. Also visible along the outer wall are bottles, gauges, and a hose from the oxygen system. This oxygen equipment is of a later system type than that used in the story and thus looks a little different.

These are some of the gauges managed by the flight engineer. The tubes on the left are the fuel sight gages, showing the level of fuel in the system. In this plane these are on the flight deck, but earlier models had them in the bomb bays instead.

This was taken from the forward bomb bay; the flight deck is directly above. The open space immediately ahead is where the nosewheel sits while retracted for flight. To the right is the pathway leading up to the nose section; the spherical object to the left is one of the two hydraulic accumulators.

The bombardier’s position: Russell’s post. At the very nose of the plane, the bombardier had a bird’s-eye view of what was below, provided there wasn’t cloud cover.

This is the bombsight, which the bombardier would use to pinpoint the target for dropping the payload. The lead aircraft’s bombardier would carefully determine the right point at which to drop, and those on the rest of the planes could simply follow the leader.

The nose turret. In later models, a hydraulic nose turret replaced the flexible guns. Some crews had a designated nose gunner while in others the navigator or bombardier would double as such.

Here I am sitting on the edge of the flight deck. To my left is the cockpit, across from me is the radio operator’s station, behind me is the bench, and to the right is the bomb bays. Also to the left is the entrance to the nose section. This area in front of me is where the interaction between Zach and Nathanael in chapter 34 takes place.

This was taken from the flight deck, looking rearward into the bomb bays. Notice how the left-handed bomb doors (right side of photo) are open and the right ones (left side of photo) are shut.

These are the bomb bays. Above is the area where the bomb racks were attached. In the story, this is where the “mission racks” were installed.

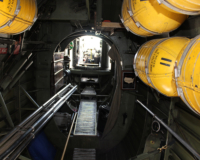
This is the bomb bay, looking back toward the waist. Notice the safety rope alongside the catwalk. Directly above is the wing center section, containing the main fuel cells.

Approximately nine inches wide, the catwalk was coated with a black material that offered good traction.

These are the steps leading from the waist down to the bomb bays. To my left is the ball turret; to the right is the bench where several crew members could sit during takeoff and landing. Behind the bench is the half deck.

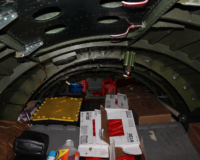
This is part of the waist section. At the back is the bench where gunners could sit during takeoff and landing. Below the bench is the entrance to the bomb bays; above and behind the bench is the half deck. In the foreground is the ball turret. The brown boxes stored ammunition for the waist guns.

This is the waist section, looking toward the tail. In the foreground is the ball turret; in the middle are the waist guns; behind the guns is the belly hatch, one of the primary entrance and exit points; and at the far end is the tail turret.

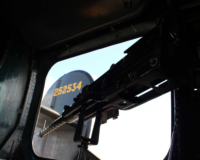
Sergeant Brentley’s position: the right waist gun. The windscreen just ahead of the window helped deflect some of the slipstream away from the gunner. Oxygen cylinders and the ball turret assembly are in the background. The waist windows were left open during flight, making this section quite breezy.


